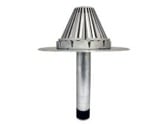
The Marathon Aluminator Retrofit drain is engineered to replace most types of broken roof drains while maintaining a strong, watertight seal. Its innovative design allows the retrofit drain to be quickly and easily installed on any roofing material.
Step 1: Job Preparation
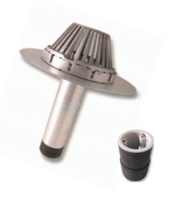 Remove the existing drain’s strainer and clamping ring, and any other components as requires to enable the Aluminator Drain flange to lie flush on the roof membrane. Also clear away any debris from the existing drain pipe that may interfere with proper installation.
Inspect the existing drain pipe to make sure there are no elbows that will prevent the drain stem from being fully inserted into the pipe. If an elbow exists, follow the directions below on how to shorten the Aluminator Drain’s length.
Step 2: Attach the Pro-Seal
Attach the Pro-Seal to the Aluminator drain stem and tighten the screws enough to hold the seal in place during installation.
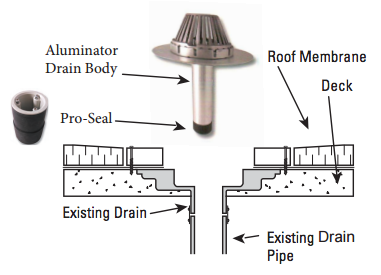
Step 3: Insert the Drain
Insert the assembled Aluminator Drain into the existing drain pipe until the flange is flush on the roof membrane.
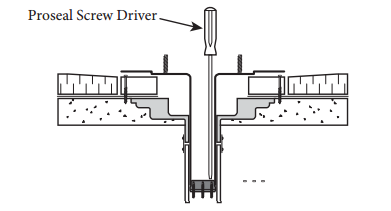
Step 4: Tighten the Seal
Alternatively tighten the seal compression rings with a Pro-Seal screwdriver until hand tight. Do not over tighten the screws.
When correctly installed, the Aluminator Drain body should not move vertically when pressure is applied to it.
Step 5: Secure the Drain Flange
Secure the drain flange to the roof deck using a minimum of three fasteners evenly spaced around the flange.
The flashing membrane must cover and extend past the fastener head. Flashing membrane must be installed per the manufacturer’s specifications.
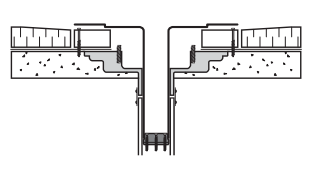
Step 6: Install the Clamping Ring
Place the Marathon Aluminum Clamping Ring over the metal studs and install it using the supplied stainless steel nuts and washers.
Tighten the clamping ring against the membrane flashing until secure. Do not over tighten, which can result in damage to the ring or studs.
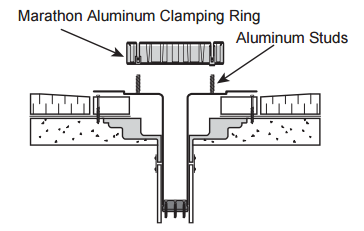
Step 7: Install the Aluminum Strainer
Install the Marathon Aluminum Strainer by aligning the screw holes with the holes in the clamping ring. Secure it with the provided screws.
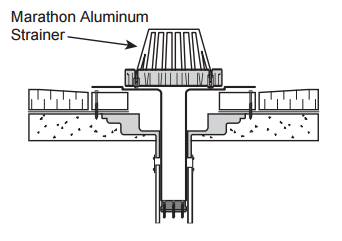
How to Shorten the Marathon Aluminator Retrofit Drain
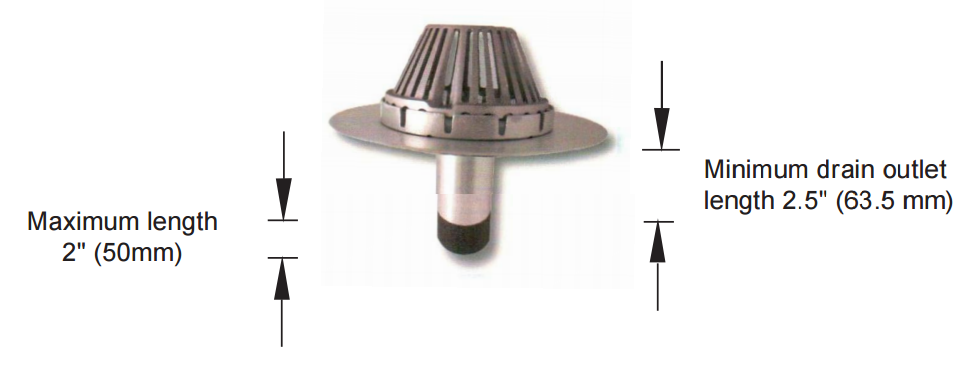
If the vertical distance of your existing drain pipe is too short to accommodate the Aluminator’s standard 12-in. drain outlet, you can shorten the length of your retrofit drain.
- Pre-Step: Make sure there is at least 4 inches in the existing pipe to accommodate the Aluminator. If not, the Aluminator will not work for your drain.
- Step 1: Cut the drain stem to the desired length. Leave at least 2.5-inches of the drain stem to attach the seal.
- Step 2: Insert the Pro-Seal in the cut drain stem and tighten the seal screws.
- Step 3: Once the drain and seal have been assembled, insert it into the existing water leader and complete the assembly by following steps 2-5 above.
If you need additional help, please call Hy-Tech at 800-635-0384.


