Search our inventory of drains, drain parts, safety and roofing equipment, and accessories. Shop Now.
Search our inventory of drains, drain parts, safety and roofing equipment, and accessories. Shop Now.
Before you being to use your Leister VARIMAT V2, it’s a good idea to familiarize yourself and your team with the controls. This can save time on the roof by cutting down on how long it takes to configure the welder.
 Primary Control
The welder is primarily controlled using the e-Drive knob. You’ll use this control to navigate through the welder options, and adjust and confirm settings.
![]()
Turn it left or right to navigate through your options.
![]()
Press the knob down to activate the welders.
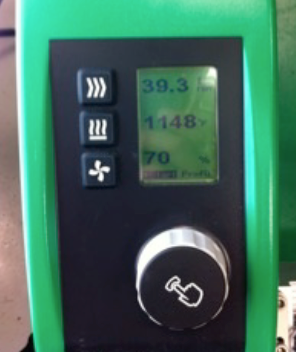
Before you begin welding, you’ll need to configure 3 settings—Speed, Heat and Air Speed. This can be done using the 3 buttons to the right of the digital screen.
![]() Drive: Use the Drive button to set the speed in ft./min. Turn the e-Drive to increase or decrease the speed.
Drive: Use the Drive button to set the speed in ft./min. Turn the e-Drive to increase or decrease the speed.
![]() Heating: Use the Heating button to configure the temperature in degrees Fahrenheit. The e-Drive will increase or decrease this setting.
Heating: Use the Heating button to configure the temperature in degrees Fahrenheit. The e-Drive will increase or decrease this setting.
![]() Speed: Configure the welder’s air speed using the Blower button. Use the e-Drive knob to increase or decrease the speed by percentage.
Speed: Configure the welder’s air speed using the Blower button. Use the e-Drive knob to increase or decrease the speed by percentage.
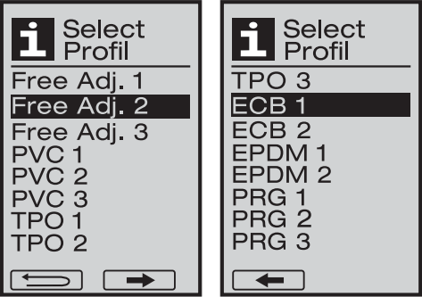
The Leister VARIMAT V2 comes with preprogrammed Material Profiles for specific thermoplastic membranes, including PVC, TPO, ECB, EPDM and CSPE. When one of these profiles is selected, the machine will automatically configure itself to the predefined settings.
To access these profiles, turn the e-Drive knob until the “Profil” option is highlighted at the bottom of the screen, and then press the knob.

From here, you can turn the e-Drive knob to select from the various profile options. Highlight and press the knob on the arrow button at the bottom of the screen to see the next page of profile options.
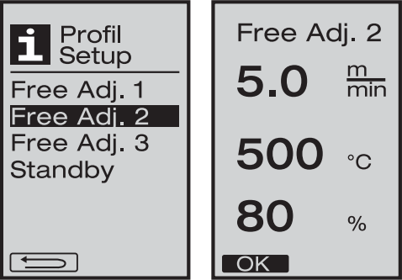
The VARIMAT V2 also gives you the option to program in your own profile speed, heat and air speed settings.
To do this, select one of the 3 “Free Adj.” profile options, and then configure your settings using the steps above. Once done, highlight the “OK” option and press the e-Drive knob. This will save the profile for later use.
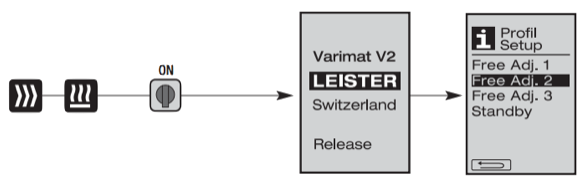
You can also navigate directly to the profile setup page by pressing and holding down the Heating and Blower buttons while turning the machine on.
Please Note: Profile settings should serve as a starting point because variables such as wind, moisture and sunlight can impact welding performance. Always perform a test weld to ensure the machine is properly configured for the job’s environmental conditions.
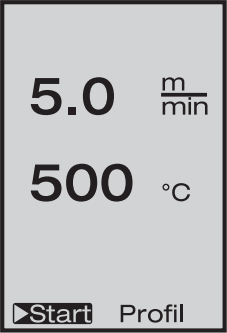
Once your drive, heat and blower are settings are configured, select “Start” from the bottom of the digital display, or press down on the e-Drive twice.
This will start the heat and blower. Give the welder 3-5 minutes to reach the operating temperature. The digital display will notify you when the welder is ready.
Now you’re ready to start your weld. For instructions, click here.
After you’ve completed your weld, cool down the VARIMAT V2 by pressing down on the e-Drive knob twice. This will turn off the heat and increase the blower speed.
The welder will cool down the element for approximately 4 minutes, and then put itself into standby mode.
If you have any questions about your welder, please give us a call at 800-635-0384, or contact your local Leister service center.